Showing posts with label decor. Show all posts

Tuesday, 3 September 2013

Wishlist: Home Edition September 2013

This month I thought I’d do a home decor Wishlist post as I have found some great websites and would happily buy everything they sell. I managed to pick a few favourite items though to add to my wishlist…

I really like the look of a small string of bunting inside the home and think this colourway would be perfect in our (almost finished) guest bedroom. Now to convince the husband!

Again I think these would work well in our guest room with the striped wall. Not sure what I would put in these but for now they will just look pretty on the floating shelves. They also come in monochrome and a lovely blush and cream colourway.

These wire baskets come in several sizes and you can even purchase solid wooden lids to turn them into practical side tables with storage from the same website. I have added the black version to my list but there is an equally gorgeous blush colour, which I am toying over too. No idea where this would go in the house but I really like it.

This world map poster has a gorgeous vintage feel to it and would look lovely in a distressed frame. I think this might be another guest room item to add to the list. I love the idea of having maps framed on the walls as they offer so much more than simple prints and I could stare at them for hours.

This sorting/document tray is going to be perfect for the new built in floating desk we have had fitted in the lounge. I want to keep the look of the pieces we style the desk with quite industrial and parted down and this will fit in perfectly.

Mercury glass is quickly becoming one of my favourite materials and, whilst I am not the biggest fan of hearts or anything too girly, this will be perfect for holding earrings and necklaces on my bedside table/night stand. At the moment I am using a scented candle to store these, meaning I can’t light the candle so this will come in handy as well and looking cute and matching the decor in our master bedroom.

These posters are really cute. Again, no idea where they would go at the moment but we’re planning to re-do the stairs and hallway at some point and I know my husband loves the idea of having frames going all the way up the stairs so I might suggest these. For those wondering, J and K are our initials.

What's on your home decor wishlist this month?

Katie xx

Wednesday, 14 August 2013

Life: Guest Room Makeover & Inspiration

** Warning: Long, photo-heavy post alert!! :) **

When we moved into this house in December 2012 there wasn't much to do thankfully. However, we did re-paint everywhere. Everywhere that is apart from our guest bedroom.

There were still unpacked boxes and junk that we needed to sort through and give away to charity and, after decorating the rest of the house, we just wanted a break for a while.

Then the niggles started. Every time I would walk past this room the old lilac walls and unpainted wooden wardrobe left by the previous owner would leave me with a sinking feeling. It was time to do something about it! So one wet weekend we went down to the DIY shop to buy paint, primer and frog tape.

I knew I wanted a Hamptons/New England style for the decor and really wanted to give stripes a go. Here are some inspiration photos I found on Pinterest...

 photo GuestRoomInspo1_zps97e6dd8b.jpg


 photo GuestRoomInspo2_zpsb22bb600.jpg


 photo GuestRoomInspo3_zps303a3d68.jpg

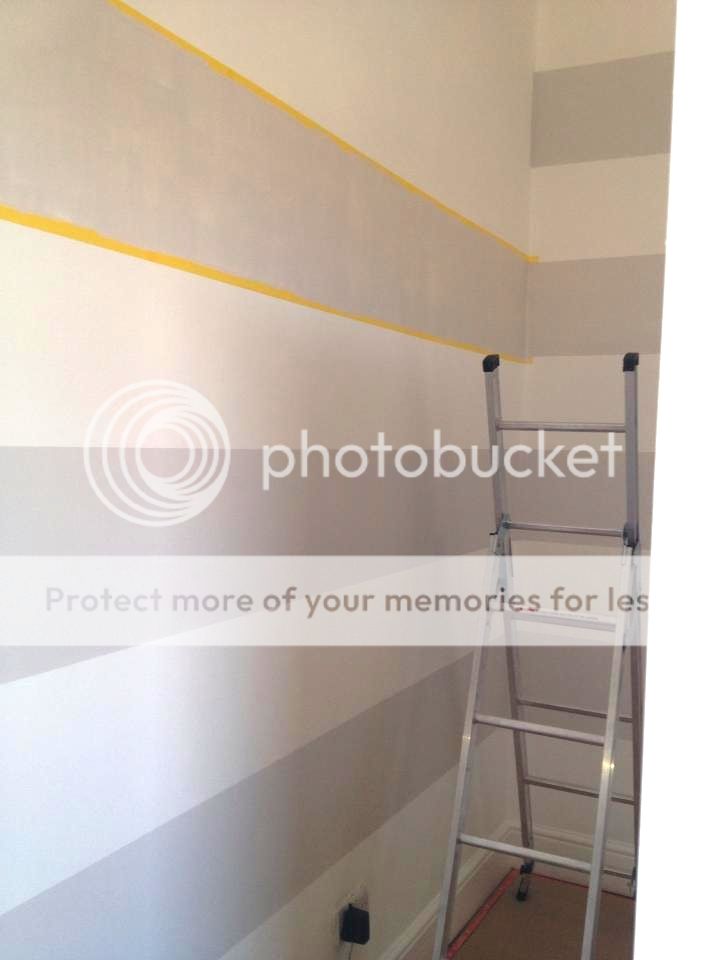
Now I had some inspiration I wanted to get started straight away so I Googled 'how to paint stripes' and went from there. With loads of tutorials and blog posts to choose from I took the best bits from each. I measured the height of the walls I wanted to paint the stripes on, divided the height equally by nine to get the number of stripes, rounded up the results to the nearest whole centimeter and added the leftovers to the bottom stripe. This means your bottom stripe will be wider than the rest but nobody will notice and, as we were putting furniture up against both striped walls, even I would be able to let this go!

Another great tip is to stick short pieces of tape inside each alternate stripe to make sure you're painting the right one (as shown in the photo below). I know this sounds obvious but when you've been at it for hours, frog tape blindness starts to kick in! Here's the journey..

 photo 47dd6fe2-9f6d-4ea1-a6dc-f75e3e28eb1a_zps693a91b7.jpg


 photo e0528016-0bae-41b3-b979-164290f2db07_zps53745663.jpg


 photo SpareRoom3_zps135d50ef.jpg

We knew we wanted a day bed in the room. Partly so we had a double bed if we had guests to stay and so it could be folded away when the guests left and partly because they offer great storage. After much searching we bought the IKEA Hemnes Day Bed. We already have the Hemnes range in our master bedroom so we knew it was great quality and we're really pleased with it.

 photo SpareRoom5_zps8c9b36df.jpg


We also primed and painted the solid wooden wardrobe that the previous owner had left. The black, metal fixings work fantastically with the pewter drawer handles on the day bed and, again, this offers much needed storage.

 photo SpareRoom4_zps39122bfe.jpg


You can just about see in one of the photos above that we have added a few simple white frames to the walls. We still have a few to put up but we're keeping the coastal theme going here too by hanging old holiday photos from my husbands' parents and shots we took on our honeymoon in Cape Cod.

The last thing to do is to style the floating shelves we have had put up. So far I have the little succulent plants below, which I love, but they're looking a little lonely.

I feel a shelf styling inspiration post coming soon...

 photo SpareRoom6_zps395bdf10.jpg

What do you think of our makeover? Would you try the Hamptons/Cape Code style in your house?

Katie xx
Related Posts Plugin for WordPress, Blogger...